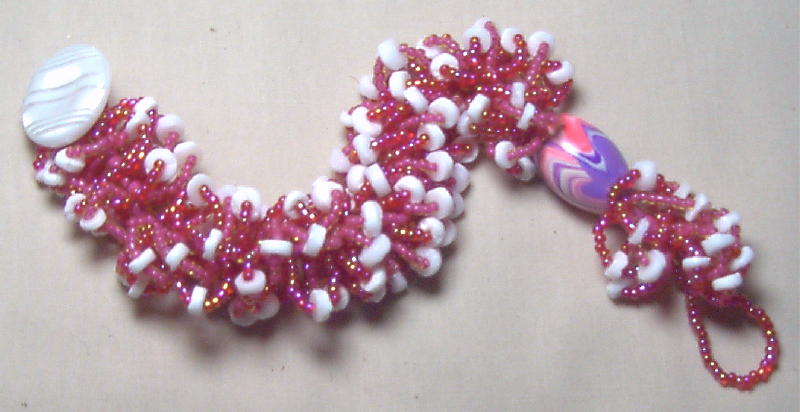
| Step 1: Attaching the button |
|
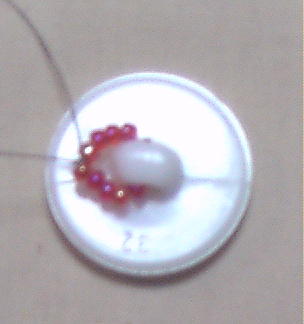
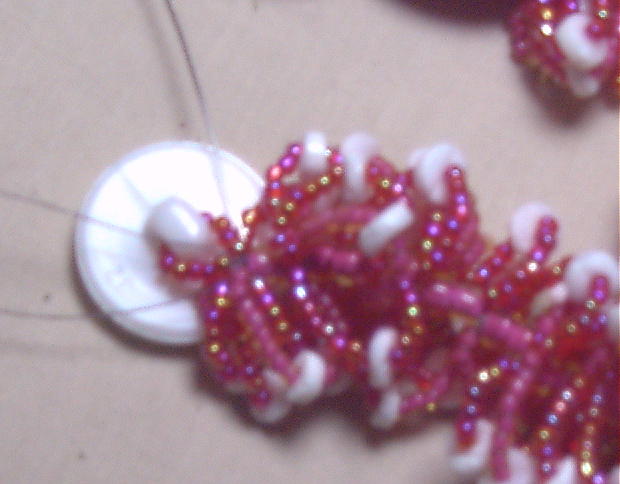
I string the button on with about 4 or 5 seeds on either side of the button shank. As a guide, this loop should hit just inside the edge of the button. This helps to make it lay flat when finished.
Tie a knot from these two ends. Leave the tail....like Arnold..."You'll be back!"
| Step 2: String your base line |
|
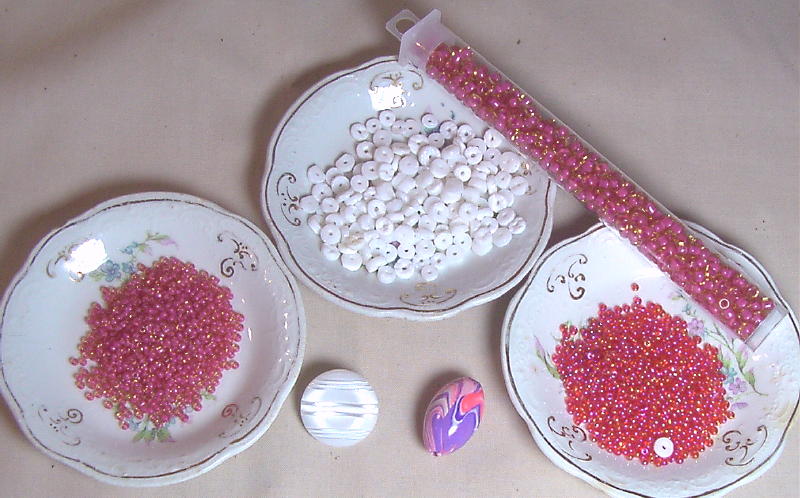
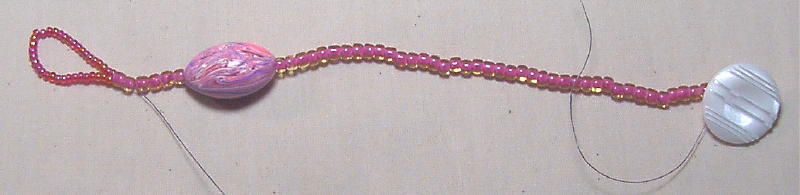
Two by Two...string your base line with size 6 or E sized beads. If you choose to use an optional bead, be sure to string an even number after it and before your button loop...two by two...get it.
Be sure your loop will fit comfortable around your button. Come back thru the first two beads on the string.
Don't pull your base line tight..even a tiny bit of slack showing is OK....you will need it.
| Step 3: Starting your loops |
|
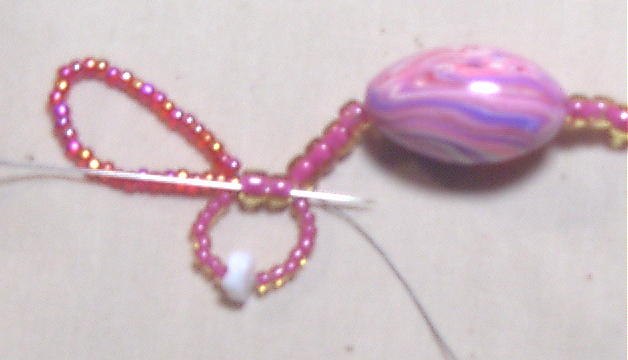
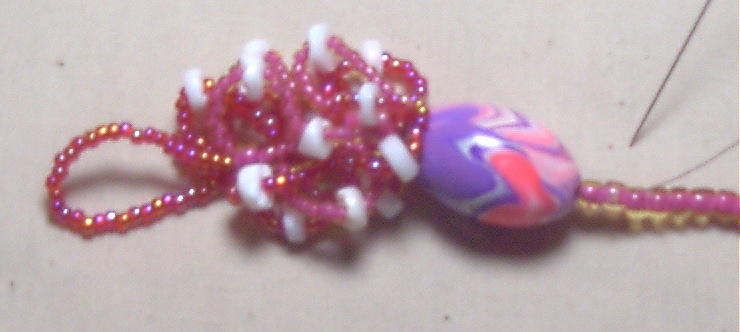
Make your first loop. I have found that my finer seeds are a bit smaller than the others. The smaller seeds, I use 8 seeds, 1 doodle bead, 8 seeds. Now go back thru the two beads you have just been thru.
I use four loops for larger beads and 5 for smaller beads....so do this 4 or 5 times thru these same two beads you just went thru.
On your last loop, you can go thru your button loop again for added strength. Then go thru the two beads you have looped around and on thru the next two beads and start looping again.
| Optional Bead |
|
If you choose to use an optional bead, when you pass thru it, also go thru the next two beads to start your looping again....just like before.
| Almost done! |
|
After your last loop, go thru the seeds that you used to secure your button and meet up with that tail that you left when you first started. Tie your stringing end and the tail in a secure knot and work the ends in. YOU'RE DONE...TA DA!
| Meet.....Mango Tango! |
|
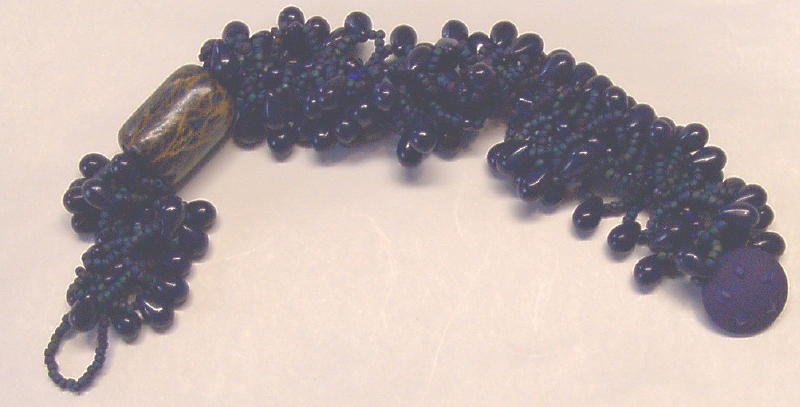
| Serengeti |
|
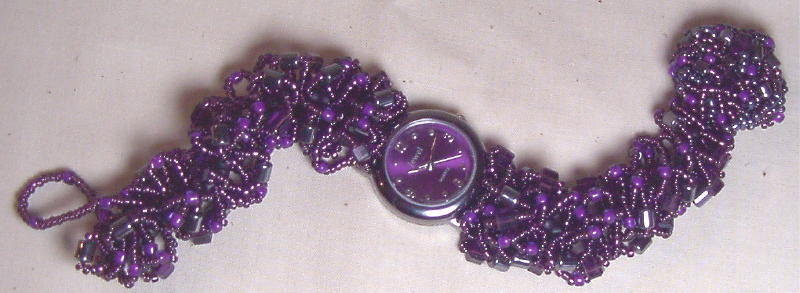
| Plum Outta Time |
|
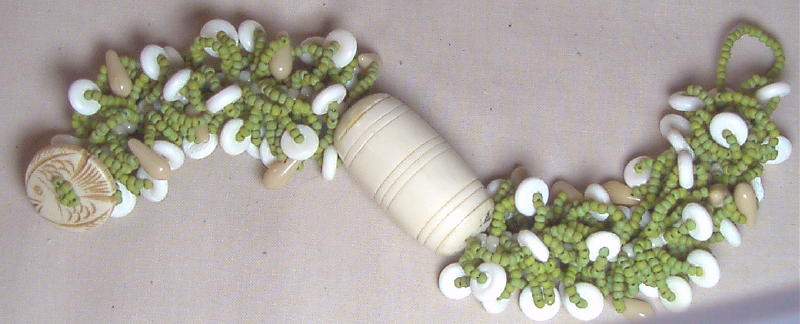
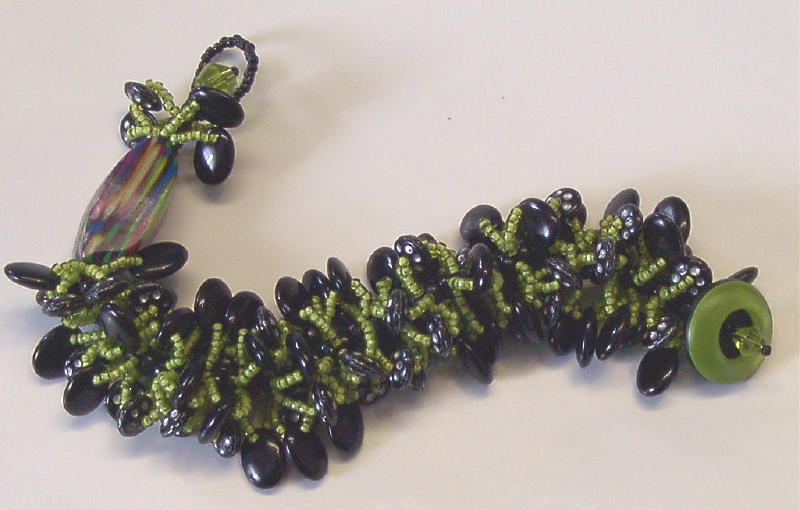
| Big Green Meanie |
|
| Old Navy |
|
Here's just a couple ideas for this technique. Hat band, choker, watch fob, candle ring, napkin ring....OH, the possibilities! Have lots of fun!
|